Windows PC
Windows x64 and WebView2 Runtime. Check the requirements page too.
HOW TO USE
Follow the new app from Characters to Camera setup and Stream setup, using the controls in the development build.
Windows x64 and WebView2 Runtime. Check the requirements page too.
Try the display with a supplied character.
Learn moreSet up the camera for your movements when needed.
Learn moreCheck the display and recording in OBS on the same PC.
Learn moreThese illustrations show each step. Open “Learn more” for instructions and app screenshots.
Choose the display language at the top of the app. Sign in with your website account, or select “Use prepared characters without signing in” to open Characters. Start with bust-up Aster, included in the development build.
What you will needWindows x64 and WebView2 Runtime. Check the requirements page too.
A built-in or USB PC camera for checking head, eye and mouth input. Not needed for image review alone.
Separate software for composing your stream. It is not bundled with Start VTuber.
For voice streaming. Configure audio in OBS.
You need a lawful basis, such as your own work, the rightsholder's permission or an applicable license. Buying an image does not necessarily permit editing, streaming, commercial use or processing by a cloud provider. Check the permitted uses before sending it; ask the rightsholder if unclear.
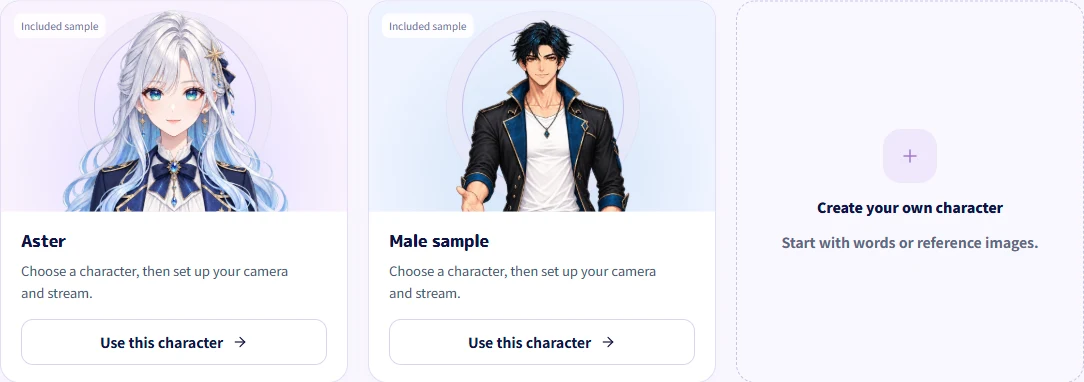
Terms of service and software licenceStart with bust-up Aster, included in the development build. After the entry screen, open Characters and select “Use this character” for Aster, the male sample, or a received character. Wait for rendering. The selection is saved on this PC; the camera has not started.
Choose a prepared character and continue to display and setup.
 View larger image ↗
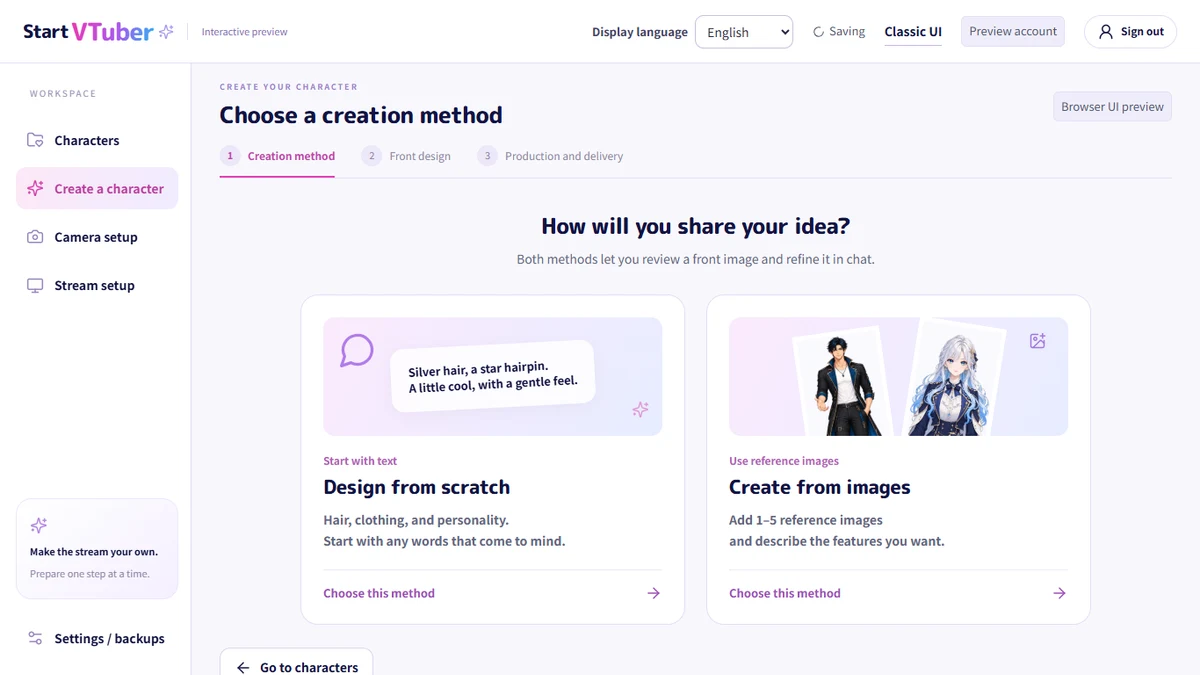
Start with text or up to five reference images, review and approve the front, review or revise directions, then receive the character after cloud finishing. Starting from images does not require repeated chat-style questions.
These screens were captured on 9 September 2026. Their appearance may differ from the current app.
 View larger image ↗
In Camera setup, choose a device and select “Start camera”. Review any permission prompt yourself. Expand or collapse your camera image using the preview controls. Watch the character and recognition status before measuring.
Start cameraBegin camera setupMeasure this postureSave these settings
Select a camera, then check its image and the character response to adjust settings.
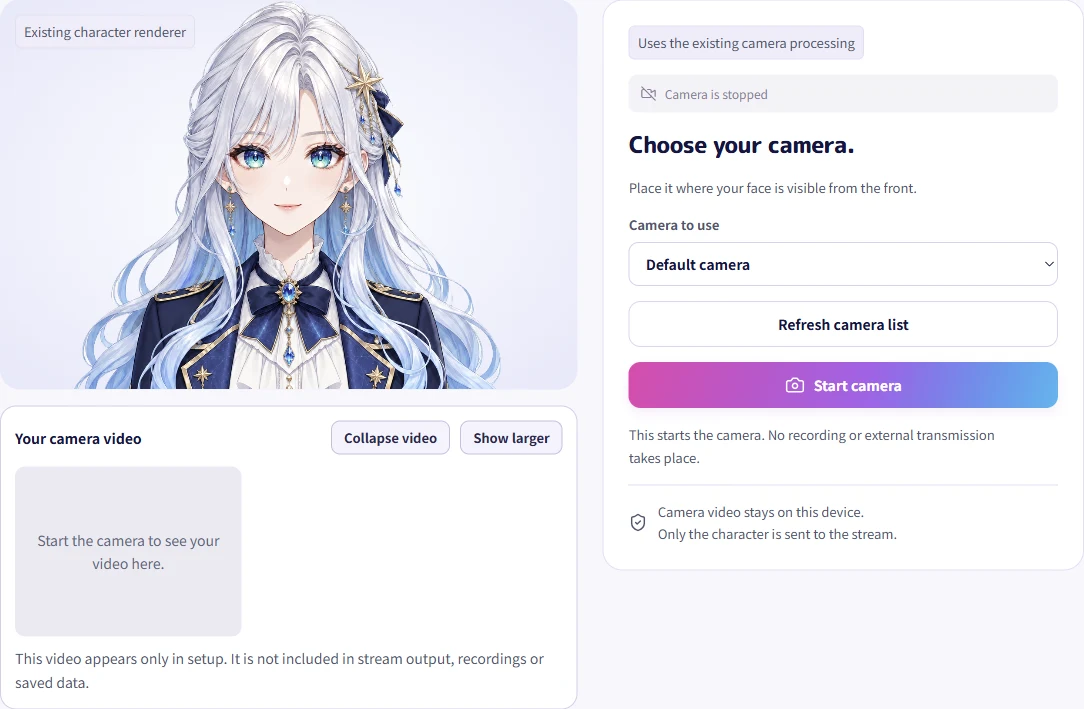 View larger image ↗
In Stream setup, drag the character to move it. Resize with the bottom-right handle or size slider, or choose the bottom-left/right presets. Wait for the saved/output-applied status, then select “Start stream output” and “Copy OBS URL”.
Adjust character position and size and prepare to display it in OBS.
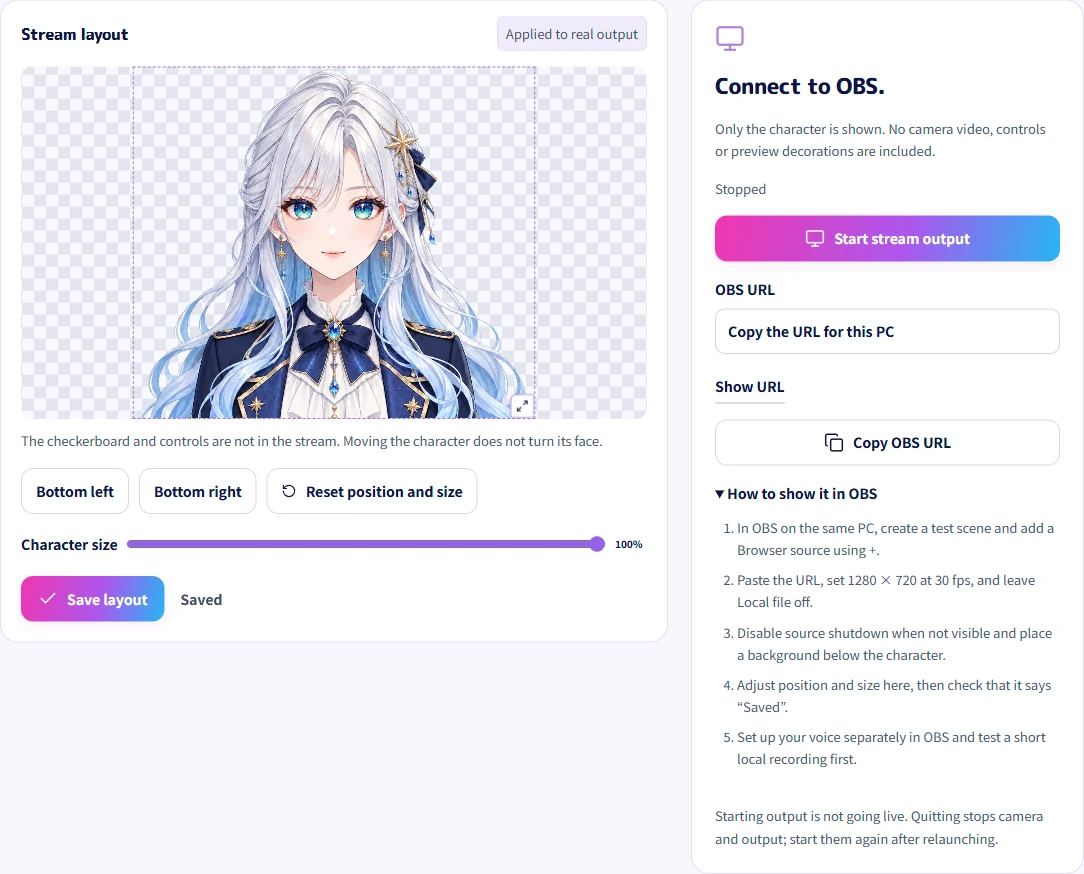 View larger image ↗
Save camera measurements with “Save these settings”. Position and size save automatically or with “Save layout”; wait for the saved status. Stop camera and stop output are separate controls. After fully closing and reopening the app, check the restored settings and start the camera/output you need.
Wait for loading and check the selected character. If an error appears, use Reload renderer. Keep the error text and character name if it repeats.
Check USB, Windows camera permissions and use by another app. Stop, refresh the camera list and select again. Adjust face position and lighting if recognition fails.
Sign in with your website account and check your valid production tickets. See pricing for purchase availability. If a result is uncertain, check the existing job before buying or generating again.
If saving failed, retry Save layout without discarding your edits. Check output start, URL and 1920×1080 in OBS, then reload the Browser source if needed.
For older projects only, open “Settings / backups” → “Open saved projects in classic UI” to use the previous editor. This does not export the new UI’s characters and placement settings together.
These are real Windows screens captured with camera and output stopped. They do not demonstrate live-face tracking, OBS recording or successful complete production with the new packs.
Source: localized Windows build studio-i18n-v1 (9 September 2026), retaining the character assets after the lip fix. Captures show sample cards and setup controls, excluding personal and authentication information.